NAIL IMAGERY
Part II: Interface Development
Monica Nguyen
Nail Imagery is designed to allow users the capability to test colors on their nails. The purpose is to make testing colors easier and more efficient without the need to physically paint colors on nails. The next step in this process was to create a ‘storyboard’ or ‘flow chart’ to visually explain how to use the application and what the design will look like.
Storyboard (Flowchart):

With the storyboard started, the interface became the next part of the process. I wanted the interface to be as simple as possible and easy for users to navigate. I decided to use blue and white because the colors give a calm and cool effect when looked at. I needed to make the instructions straight forward so users would know exactly what they could do. The only distinct color changes are the sample swatches and the screenshot heart icon. I used Adobe Illustrator to develop these pages. Within these designs are separate icons that will act as buttons for navigation between pages of the interface.
Interface Designs:

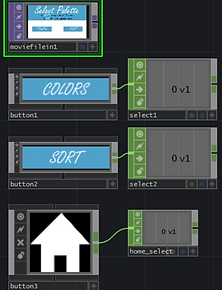
To put these designs to use we created a COMP Container first as the overall project to use for putting in pages of the application. Within the COMP Container we created a COMP Select, renaming the COMP Select as mainScreen since it would be used as the screen that users would stay on and interact with. Within the COMP Select mainScreen we created five COMP Containers each renaming them their respective page numbers page1, page2, page3, page4, and page5; these are the pages the user will see as they navigate. Within each COMP Container page is a CHOP Movie File In which is the background image file of the page. And depending on how many icons/buttons I needed for the page there are COMP Buttons which are the buttons used for the page.


Specifically within COMP Container page3 are Nail Imagery’s previous operators from project square one; the only modifications are combining the operators by using a TOP Composite that connects the background TOP Movie file In of page3 and the TOP Matte of Nail Imagery’s square one operators. When combining the TOP Matte to the TOP Composite; in between those operators we needed to include TOP Transform to make sure the camera is in the correct position of the screen. Also adding a TOP Flip operator after Nail Imagery’s sqaure one TOP Video Device In operator to make sure the camera is mirroring the user.


Finally to make the interface work, a DAT CHOP Execute is created to input code for the containers to follow. Using a CHOP Count operator to connect to the DAT CHOP Execute by inputing the opeator name in the parameter CHOP count1 which allows the user to go through the pages linearly. While CHOP Logic connects to CHOP Count to follow the operation of changing to the next page number. Creating CHOP Selects link to the mainScreen which is the linear progression of how the pages will conduct. And lastly creating a CHOP Select for the home button to allow users the ability to go back to the mainScreen or page1 which is also connected to a CHOP logic to move in a linear progression that the CHOP Count expresses.
